Securing your website with HTTPS is a must-have for modern websites, as it provides secure communication between the user and the website, ensuring data integrity and letting the user know that their messages with the server have not been tampered with. Not only this, but Google also provides an SEO boost to your sites search ranking if it uses HTTPS. What is there not to love!
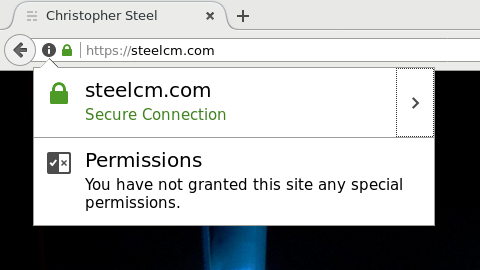
So, how do you go about adding the little green padlock to your site that means so much? the following article will run through the steps necessary to get yourself an SSL certificate for your self-hosted site.
- Purchase an SSL certificate
- Generate a Certificate Signing Request (CSR)
- Generate a Personal Information Exchange (PFX)
Purchase an SSL certificate
First of all we need to purchase an SSL certificate. To do this you'll need to find an "SSL broker", most hosting companies provide this service. I personally use 123-reg.co.uk, as they provide relatively cheap "123-SSL" certificate package.
Generate a Certificate Signing Request (CSR)
Once you've purchased your SSL certificate, you need to register with the Certificate Authority. This requires a Certificate Signing Request, or CSR for short, which is a file submitted to the Certificate Authority and used to verify and create your SSL certificate. It contains a bunch of information identifying you, the applicant, such as business name, country, email address...etc, as well as a public key you generate. The resulting *.csr file contents has all this information, a byte offset, and wrapped up in Base64 encoding. TLDR, it's a bunch of gobbledygook and looks like the following (sample pulled from Wikipedia).
-----BEGIN CERTIFICATE REQUEST-----
MIICzDCCAbQCAQAwgYYxCzAJBgNVBAYTAkVOMQ0wCwYDVQQIDARub25lMQ0wCwYD
VQQHDARub25lMRIwEAYDVQQKDAlXaWtpcGVkaWExDTALBgNVBAsMBG5vbmUxGDAW
BgNVBAMMDyoud2lraXBlZGlhLm9yZzEcMBoGCSqGSIb3DQEJARYNbm9uZUBub25l
LmNvbTCCASIwDQYJKoZIhvcNAQEBBQADggEPADCCAQoCggEBAMP/U8RlcCD6E8AL
PT8LLUR9ygyygPCaSmIEC8zXGJung3ykElXFRz/Jc/bu0hxCxi2YDz5IjxBBOpB/
kieG83HsSmZZtR+drZIQ6vOsr/ucvpnB9z4XzKuabNGZ5ZiTSQ9L7Mx8FzvUTq5y
/ArIuM+FBeuno/IV8zvwAe/VRa8i0QjFXT9vBBp35aeatdnJ2ds50yKCsHHcjvtr
9/8zPVqqmhl2XFS3Qdqlsprzbgksom67OobJGjaV+fNHNQ0o/rzP//Pl3i7vvaEG
7Ff8tQhEwR9nJUR1T6Z7ln7S6cOr23YozgWVkEJ/dSr6LAopb+cZ88FzW5NszU6i
57HhA7ECAwEAAaAAMA0GCSqGSIb3DQEBBAUAA4IBAQBn8OCVOIx+n0AS6WbEmYDR
SspR9xOCoOwYfamB+2Bpmt82R01zJ/kaqzUtZUjaGvQvAaz5lUwoMdaO0X7I5Xfl
sllMFDaYoGD4Rru4s8gz2qG/QHWA8uPXzJVAj6X0olbIdLTEqTKsnBj4Zr1AJCNy
/YcG4ouLJr140o26MhwBpoCRpPjAgdYMH60BYfnc4/DILxMVqR9xqK1s98d6Ob/+
3wHFK+S7BRWrJQXcM8veAexXuk9lHQ+FgGfD0eSYGz0kyP26Qa2pLTwumjt+nBPl
rfJxaLHwTQ/1988G0H35ED0f9Md5fzoKi5evU1wG5WRxdEUPyt3QUXxdQ69i0C+7
-----END CERTIFICATE REQUEST-----
To generate this beauty you can use the OpenSSL Toolkit which ships with Linux and MacOS. If you are using Windows do not despair, you can download binaries from http://gnuwin32.sourceforge.net/packages/openssl.htm.
Once you have the toolkit, run the following command:
openssl req -new -newkey rsa:2048 -nodes -out www_mywebsite_com.csr -keyout www_mywebsite_com.key
This command will then prompt you to enter the applicant information, fill in to your hearts desire but make sure you enter "www.{mydomain}.com" for the common name if you want the SSL certificate to cover the domain both with www and without (ie. www.mydomain.com and mydomain.com).
openssl req -new- create a new PKCS#10 X.509 Certificate Signing Request (CSR).-newkey rsa:2048- generate new public key using 2048 bit encryption.-nodes- generate an unencrypted private key.-out www_mywebsite_com.csr- output the CSR into the named *.csr file.-keyout www_mywesbite_com.key- output the generated private key into the named *.key file.
You should now have a *.csr and a *.key file. You can submit the CSR through your SSL broker and await approval. With 123-Reg I had to copy and paste the contents of the *.csr into their online form.
The approval process can then take 4 to 24 hrs to complete, and the Certificate Authority (CA) may contact you for any missing information and verify that you own the domain.
IMPORTANT please note that the approval email will be sent to a predefined list of email addresses (admin/administrator/postmaster/hostmaster/...etc@{mydomain}.com), you will need access to one of these accounts, or like me, have wild card forwarding set-up for your emails.
Generate a Personal Information Exchange (PFX)
Once you have been approved by the Certificate Authority (CA) you will receive your certificate, copy this text into a *.crt file. You should now have three files *.csr, *.key and *.crt. Depending on your hosting provider this should be enough, but I'm running my sites on Microsoft Azure Cloud Platform which requires me to upload a Personal Information Exchange (PFX) file. No worries! The OpenSSL Toolkit comes to our rescue once again! Run the following command to generate a *.pfx file. You will be prompted to enter a password as part of this process and you will need this password when uploading to Azure, so keep it safe.
openssl pkcs12 -export -out www_mywebsite_com.pfx -inkey www_mywebsite_com.key -in www_mywebsite_com.crt
openssl pkcs12 -export- create a new pfx file.-out www_mywebsite_com.pfx- ouput the pfx to the named*.pfxfile.-inkey www_mywebsite_com.key- the private key file we generated as part of the CSR process.-in www_mywebsite_com.crt- the ssl certificate provided by the Certificate Authority.
You can now upload the resulting *.pfx file to Azure, and enable SSL for your domains. It's a good idea at this point to also set-up a 301 redirect rule for http to https to ensure all communication goes through your new secure channel.
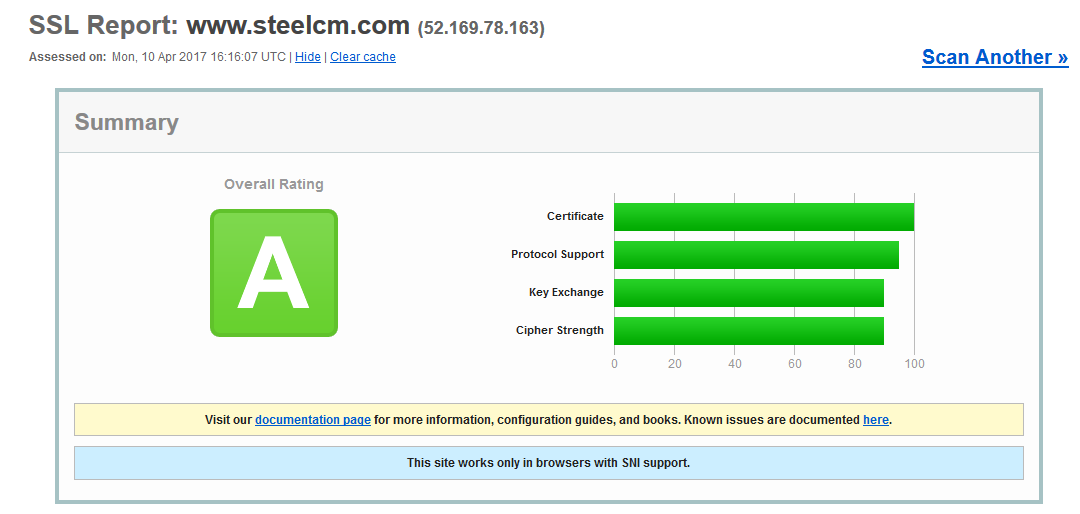
To top it all off you should run your site through an online SSL server tester, such as the one provided by Qualys, to ensure you get the satisfaction of seeing a big ol' green A!